Export Jobs
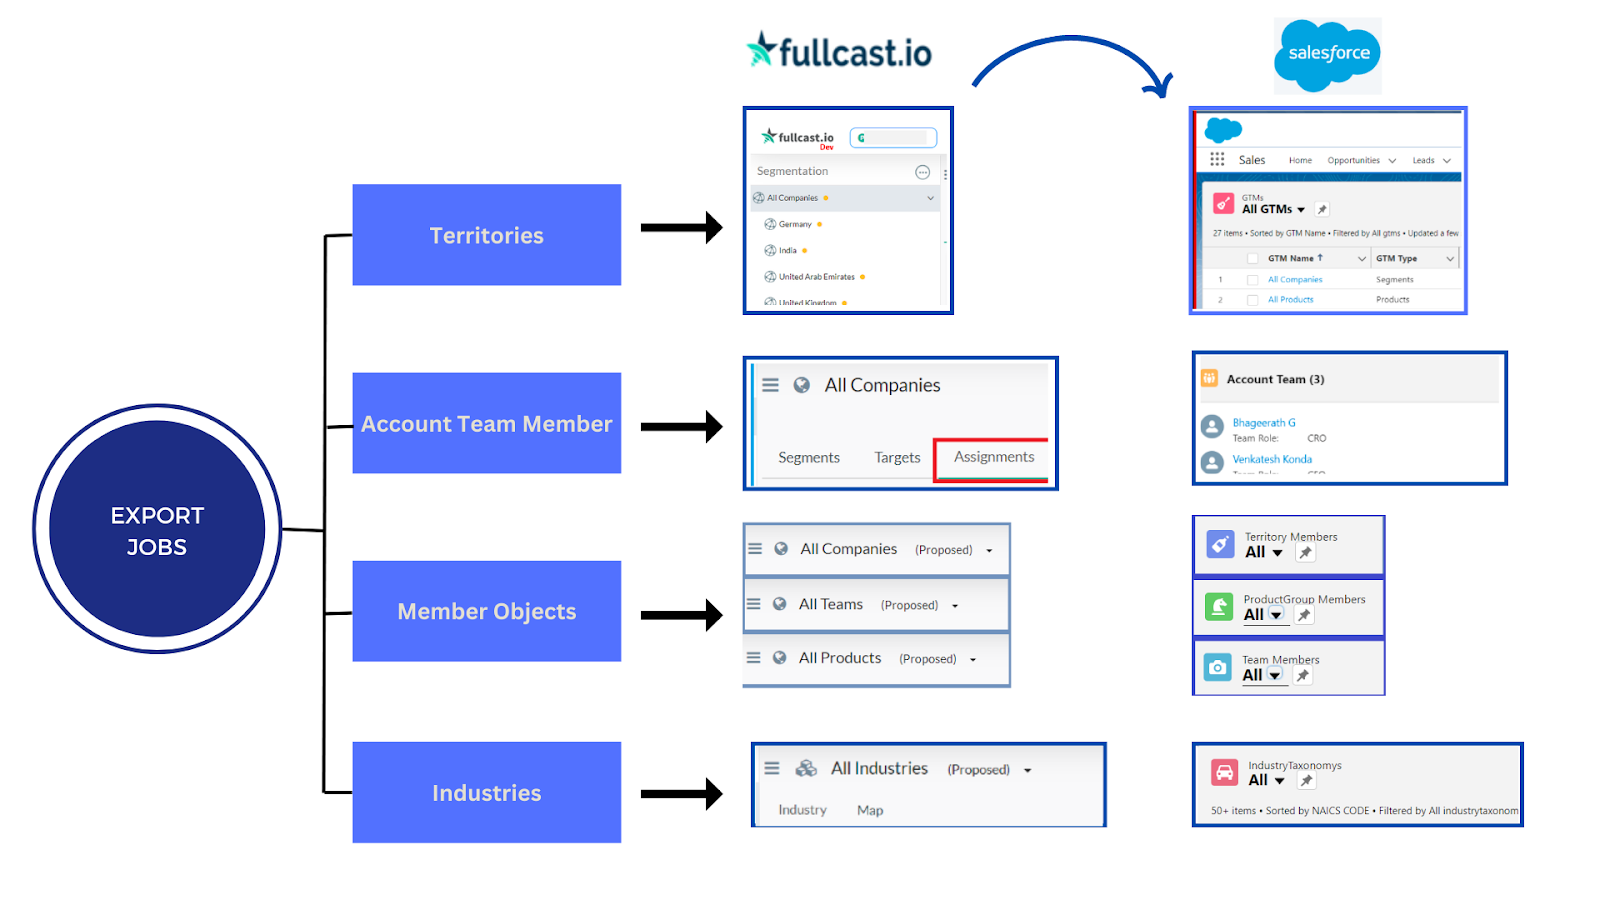
This article aims to provide information and direction on exporting jobs from Fullcast. Jobs are the specific tasks associated with managing and optimizing your revenue generation processes. Exporting jobs transfers data such as territories, account team members, member objects, and industries from Fullcast to Salesforce.
For more information on creating a Job Schedule, refer to the Schedule a Job with Fullcast article.
Notes:
- Changes made in Fullcast must be committed to be picked up and executed in the next export job.
- Salesforce does not reflect assignment updates made after a successful import or export.
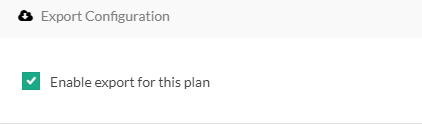
- Plans and roles must be enabled for export.
Enable a Plan for Export in Fullcast
- Access your Fullcast instance and switch plans if applicable.
- Click Manage Plans in the top right corner.
- On the plans landing page, click the More Options icon (three vertical dots) and select Edit.
- Click the enable export for this plan option.
- Click Save.
The plan is now available for export.
Run an Ad-hoc Import or Export in Fullcast
- Access your Fullcast instance and switch plans if applicable.
- Click the Setting icon (gear).
- Click Jobs.
- On the Job Status tab, click Import/Export and identify the action you wish to perform on this job: Import, Export, Migrate All, or Migrate Latest.
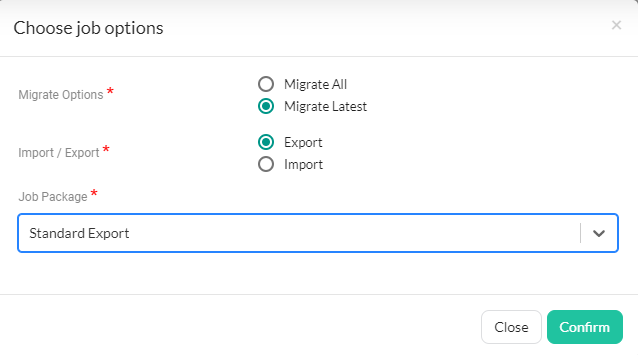
Note: Migrate All will migrate all records whereas Migrate Latest will transfer only those records that have been changed since the last export.
- Select the applicable package from the Job Package dropdown menu.
Note: The Import/Export option identifies which type of package you want: standard or custom. For instance, if the merge type is “Migrate All” or “Migrate Latest,” and the job type is import, the Job Package dropdown will display “Standard Import.” Conversely, if the job type is Export, the Job Package dropdown will show options “Simulate Stanard Export” and “Standard Export.”
- Click Confirm to start the export.
Schedule a Job in Fullcast
- Access your Fullcast instance and switch plans if applicable.
- Click the Settings icon (gear).
- Click Jobs.
- On the Jobs landing page, click the Scheduled Jobs tab.
- Click the edit icon (pen and paper) to the right of the applicable job.
- Set the frequency for the job to run and select a start date.
Note: If a start date is not present, Fullcast will pick the next runtime according to the repeat frequency.
- Click Confirm.
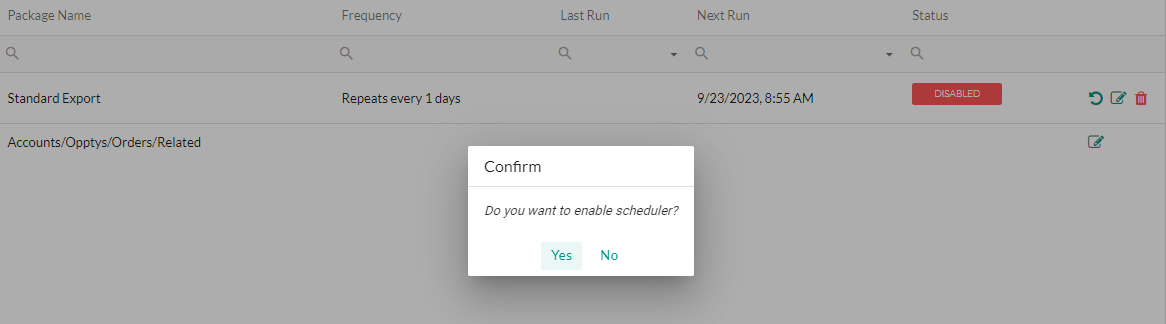
Enable or Disable a Job in Fullcast
Scheduled jobs can be enabled and disabled to fit your business needs. To adjust a scheduled job to on or off, click the refresh icon to the right of the corresponding job, and select the applicable option.
Edit or Delete Schedule Jobs in Fullcast
- Access your Fullcast instance and switch plans if applicable.
- Click the Settings icon (gear) and click the Jobs tab.
- Click the Jobs Schedule tab.
- Click the edit icon (pen and paper) to view and make changes to the schedule, or click the delete icon (trashcan) to remove the scheduled job completely.