Connect Fullcast to Salesforce
This article provides information and direction on connecting your Fullcast instance to your Salesforce instance. The Fullcast and Salesforce integration must be authenticated in both your Salesforce and Fullcast instances.
Import and Export Authentication
The data exchange between Fullcast and Salesforce requires the API integration to be authenticated in our integration layer. This is currently not available from within the Fullcast app. Please contact your Business Partner to schedule a call with product support to complete the authentication.
Connected App Authentication
The connected app allows Fullcast to read Salesforce metadata, which enables the ability to manage the data within Fullcast. This authentication process can be completed without contacting product support.
Below are the steps to authenticate the connected app from within Fullcast.
- Access your Fullcast instance and switch plans if applicable.
- Click the Settings icon (gear) and click Manage Settings.
- Click Policies in the menu bar.
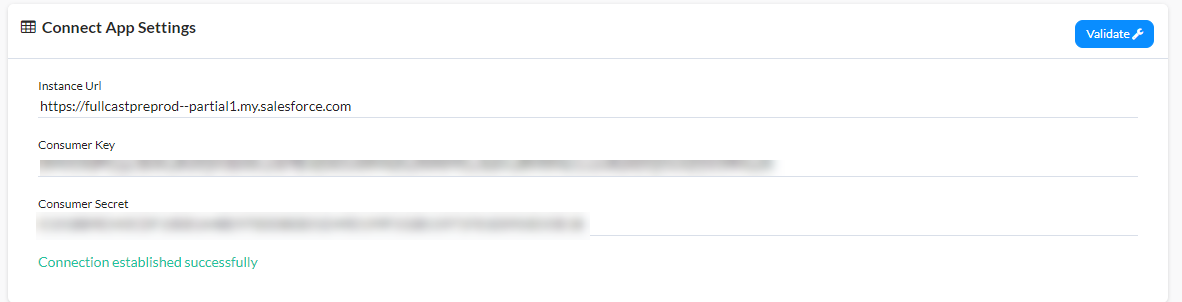
- Input the Salesforce instance URL in the Instance URL field under Connected App Settings.
Note: When copying the URL, include the “https://” otherwise it will not validate.
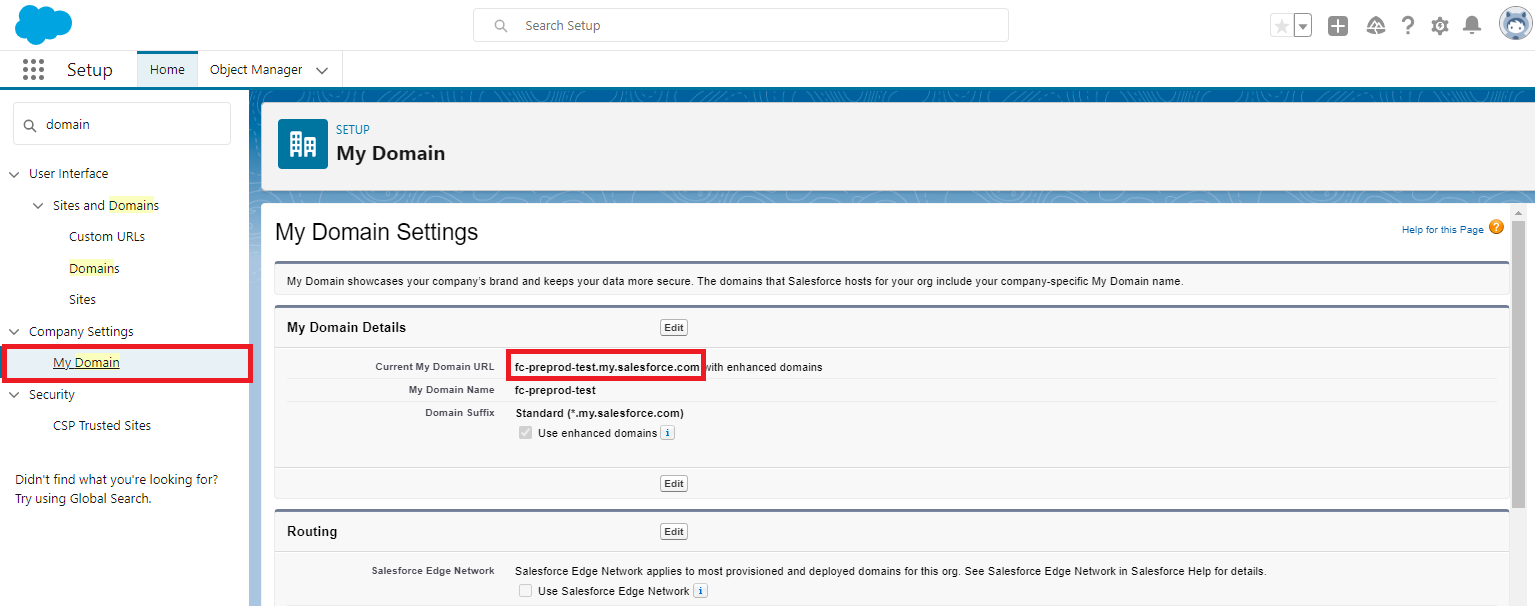
Note: To get the instance URL from Salesforce navigate to your Salesforce instance navigate to Setup > Domains and select My Domain under Company Settings. Copy the URL in My Domain URL and paste it into the corresponding Fullcast field. This method does not function with custom domains that employ SSO. Instead, you can utilize login.salesforce.com to authorize the application. Once you have logged in and granted access, the instance URL will be updated.
- Access Salesforce and click the Settings icon (gear).
- Select Setup from the dropdown menu.
- Search and access App Manager and locate the Fullcast Motion App.
- Click More Options (carrot) to the right of the Fullcast Motion App and select View.
- Click Manage Consumer Details and verify your identity when prompted.
- On the Consumer Details page, click Copy to copy the Consumer Key and Consumer Secret.
- Return to Policies and input the Consumer Key and Secret in the respectable fields.
- Click Validate, then click Save.
- Click the unable to validate connection option. Click here to authorize message below the Consumer Secret field and log into your instance when prompted.
After completing the authentication, the following message will be displayed until the first import of data has been completed.
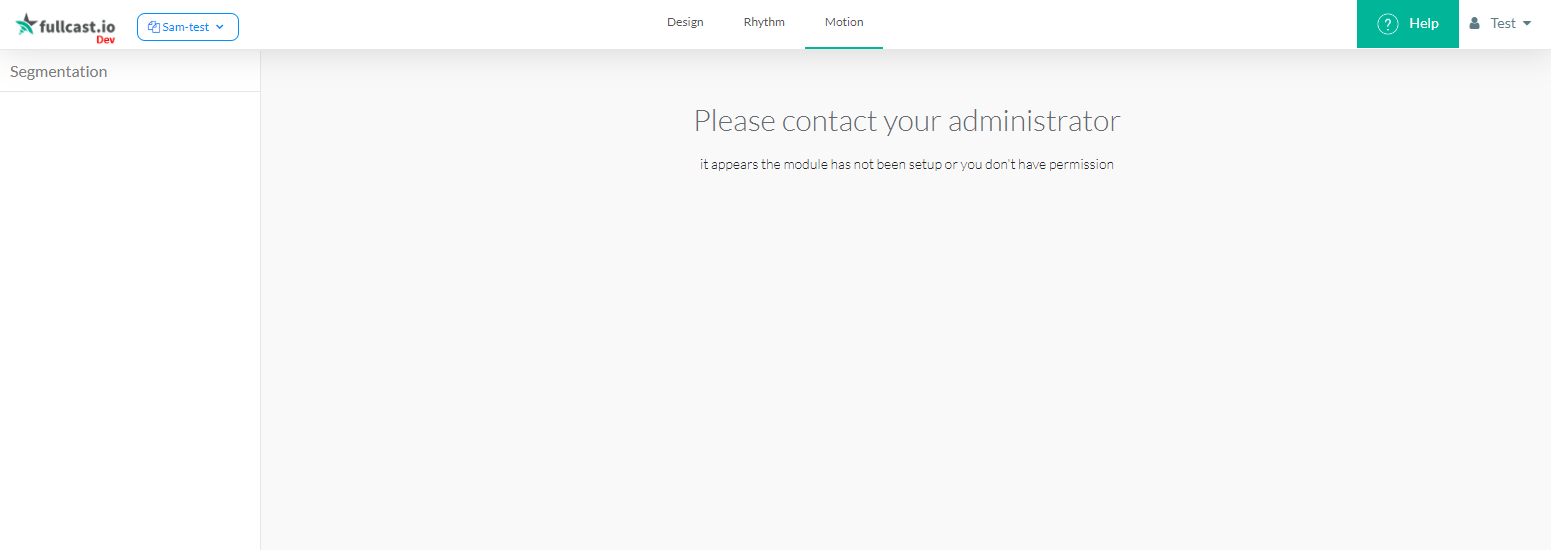
Note: This screen appears because you have not had your first data import. Contact your Business Partner to complete the first import process.