Round-robin functionality for package version 2.160 and above
Note: This round-robin functionality is only for package versions 2.160 and above. Other users, please follow the Routing Policy Configuration article.
GTM trigger flag
Ensure that you have enabled the GTM trigger flag in Fullcast setting, before proceeding. If not click Round-robin install/upgrade notes to know how to enable.
Stage 5 - Round-Robin
Suppose you would like to assign incoming opportunities to a team of Sales Development Reps. In that case, you can enable round-robin distribution to make sure that your salespeople are getting equal workloads. This can be combined with any of the routing stages to optimize the allocation of work to the various teams and roles. There are two types of Round-robin functionality available.
Team-based round-robin functionality
If you want to select a team that has a selected list of participants who can share the workload in the round-robin method, then we use team-based round-robin. To add participants to assign incoming cases in a round-robin methodology follow the below steps:
- Access your Fullcast instance and switch plans if applicable.
- Click Manage Policies by Territory on the Policies tile.
- Access an existing policy or click New Policy to add a new policy.
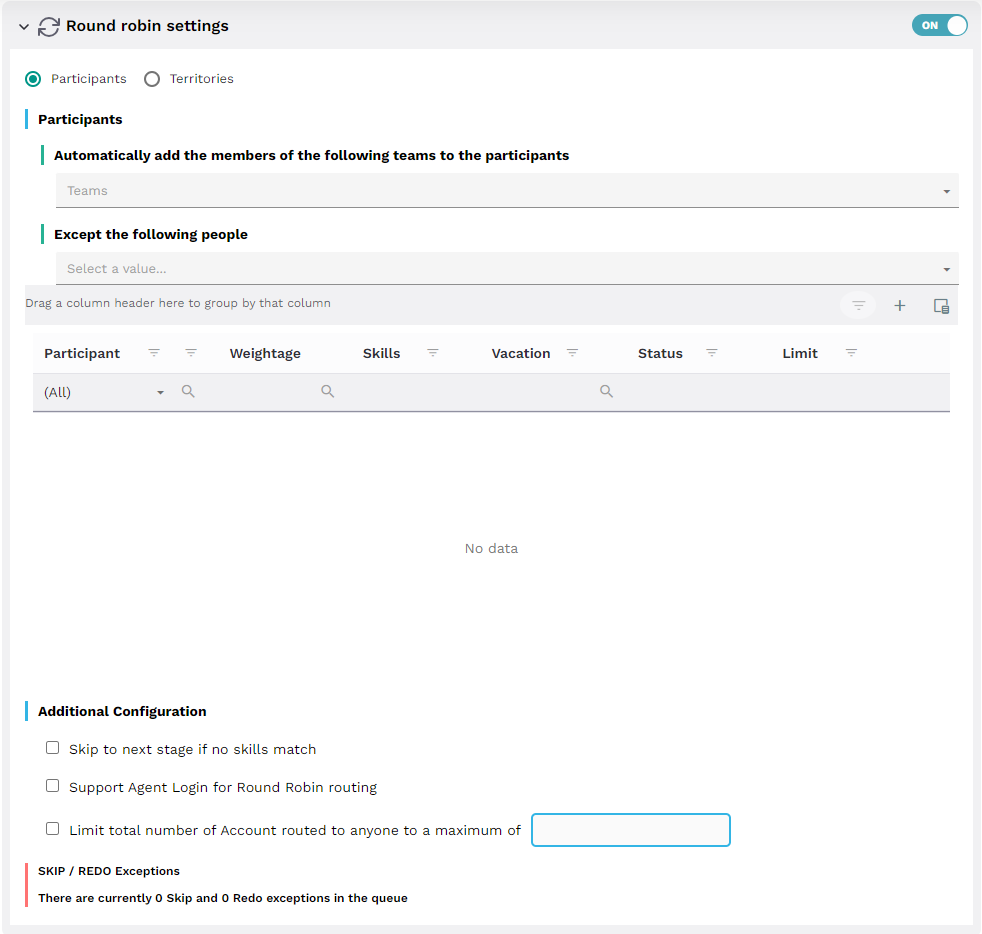
- Click Participants or Territories as applicable.
Note: The Participants option is enabled by default.
- Click the dropdown menu and drill down to the participants you want to add to the round-robin.
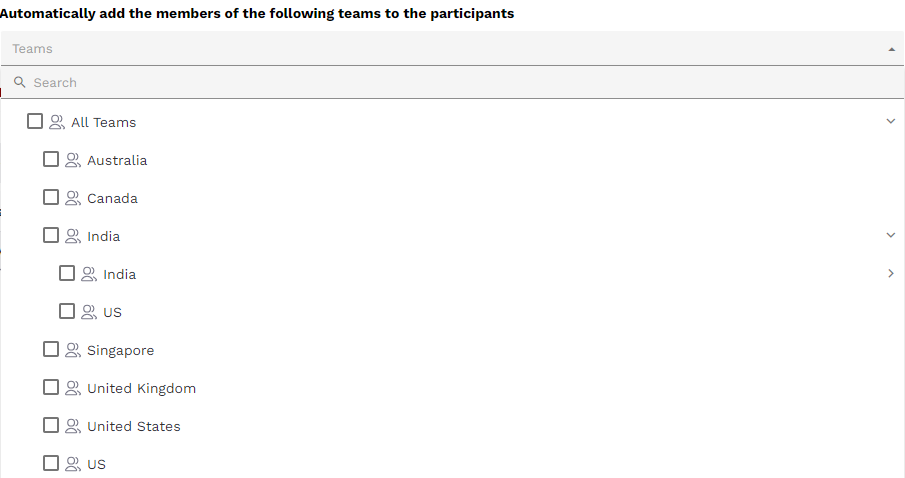
- Add any participants that should be excluded from the round-robin list.
- If there are any members who need to be removed from the round-robin list, select their names from the drop-down in the exception list.
- Apart from the automatic addition of members from the team, members can be added to the participants list manually as well. Only the members added manually can be deleted using the delete icon available at the end of the table against the participant name.
Points to remember for territory-based round-robin
- You can select a territory only from the current plan where the policy is setup.
- If the parent node has children, the child nodes will be displayed in the participants list.
- It is mandatory to select the role of the person to whom the opportunity should be routed in each territory.
Managing Round-Robin participants
After selecting participants either based on teams or territories, we can manage and specify certain fields to route cases to the appropriate person.
- Weightage: If a person is assigned a higher value in the weightage column, they will receive more cases. The number of cases routed to a person depends on their assigned weightage. If everyone has the same value, each person receives an equal share of leads.
- Skill: You can add a skill to filter cases and assign them to specific individuals. For example, you can assign French-speaking SDRs to opportunities in French-speaking countries by adding "French" as a skill.
- Vacation: After saving a participant, you can manage their vacation details by clicking the manage icon next to their name.
- Status: The status column indicates whether a person is active or inactive in handling cases.
- Limit: If you want to set a limit on the number of cases routed to any participant, you can use the Limit column. This limit can be set on an hourly, daily, or personal basis. Once the set limit is reached for a particular person, the opportunity is routed to the next eligible person.
Additional configuration in the Round-robin stage
Additional configuration options in the Round-robin stage facilitate more filter criteria and streamline the routing process.
- You can check the box to skip the round-robin stage if no matching skills are found. This allows for direct progression to stage 4 - Defaults and record tagging.
- To enable support from agents for round-robin routing, you can check the box labeled "Support Agent login for Round-robin routing."
- When a large number of cases are created, you can set a maximum limit on the number of cases distributed to representatives by checking the box labeled Limit the total number of cases routed to anyone to a maximum of option.