Configure Case Routing Policies in Fullcast
This article provides information and direction on configuring a case routing policy in Fullcast.
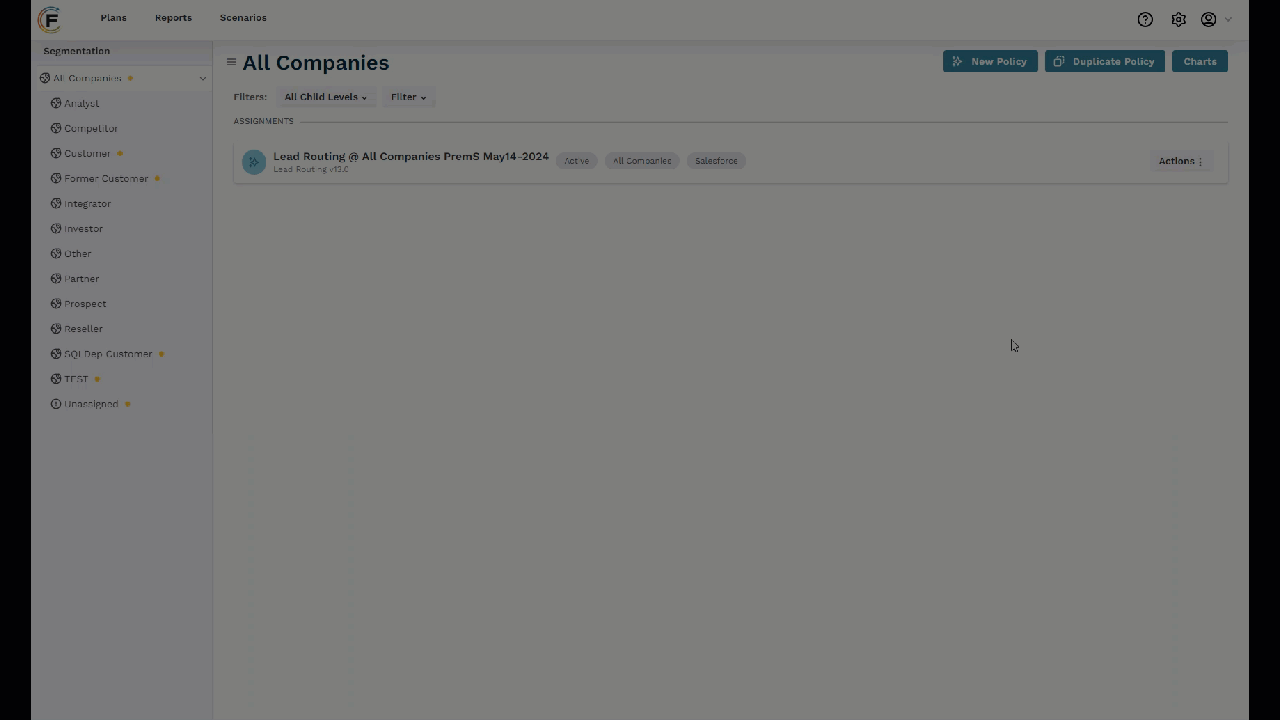
Add a New Case Routing Policy in Fullcast
- Access your Fullcast instance and switch plans if applicable.
- Click Manage Policies by Territory on the Policies tile.
- Click Add New Policy.
- Click Add Policy on the Case Routing tile.
- Configure the routing stages as applicable.
- Configure the Policy Operation Tags and Policy Operation Times.
- Click Save and Exit.
The case routing process consists of several stages, each of which can be switched on or off based on specific requirements. The general stages for case routing are:
- Duplicate Processing
- Role-based Routing
- Round Robin Settings
- Default Users and Record Tagging
- Notifications via Chatter
Duplicate Processing

This stage allows you to define how duplicates are managed when found.
- Toggle the Duplicate Processing switch to ON.
- Define what to do if duplicates from the same domain are found: Do nothing or Route.
- Proceed to the next stage if applicable.
Role-based Routing

At this stage, you can route incoming cases to an account owner or based on specific criteria.
- Toggle the Role-based Routing switch to ON.
- Identify what to do if the lead is matched to an account: route to owner or route based on specified criteria.
- Proceed to the next stage if applicable.
Round Robin Settings
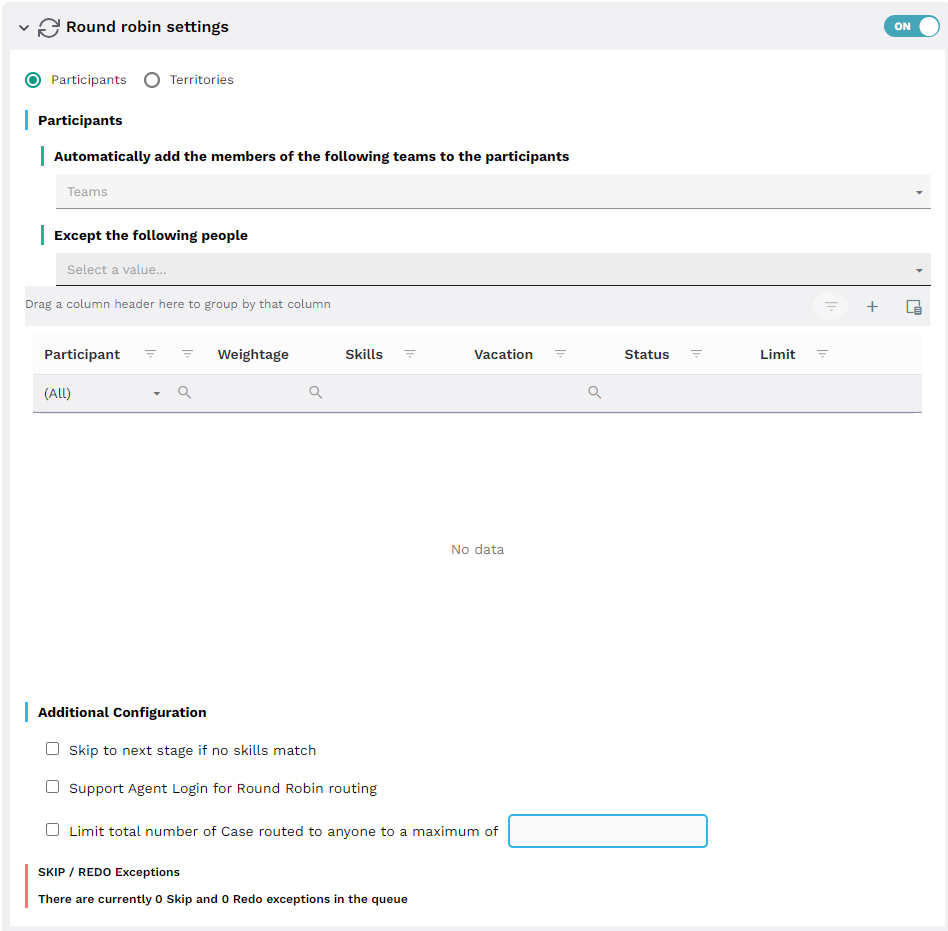
If you want to assign incoming cases to a team of reps, you can enable round-robin distribution to ensure equal workloads for your salespeople. This option can be combined with the previous stages to optimize workload allocation across different teams and roles.
- Toggle Round Robin Settings to ON.
- Click the radio button to select either Participants or Territories.
| Option | Action |
| Participants |
|
| Territories |
|
- Complete the additional configuration options as appropriate.
- Proceed to the next stage if applicable.
Additional configuration in the Round-Robin stage
- Additional configuration options in the round-robin stage offer more filter criteria and simplify routing execution.
- Bypass the round-robin stage when no matching skills are found by checking the designated box. This allows for direct routing to Default Users and Record Tagging.
- If agent support for round-robin routing is required, check the box labeled “Support Agent login for Round-robin routing.”
- Limit the number of leads distributed to reps by setting a maximum limit and specifying the amount.
Default Users and Record Tagging
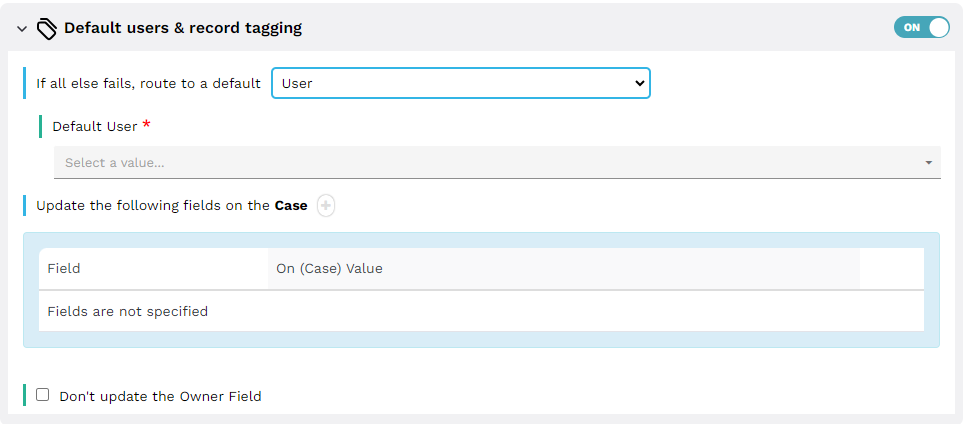
In this stage, set a default user or queue to send incoming cases to.
- Toggle Default Users and Record Tagging to ON.
- Select whether to route to a queue or user.
- Identify the queue or user as appropriate.
- Click the grey plus button to identify what fields to update on the case.
- Select the Don’t update the Owner Field option if applicable.
- Proceed to the next stage if applicable.
Notifications via Chatter
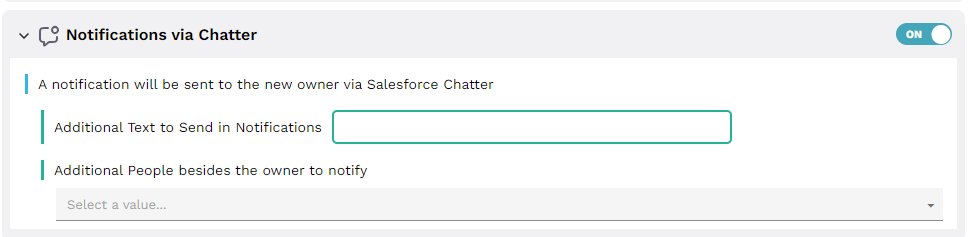
Notifications via chatter will send messages to users when incoming leads are routed.
To configure notifications via Chatter
- Toggle the Notifications via Chatter switch to ON.
- Add additional text to send in the notifications if applicable.
- Identify the additional people to send notifications to besides the owner.
- Click Save and Exit.
Policy Operation Tags and Policy Operation Times
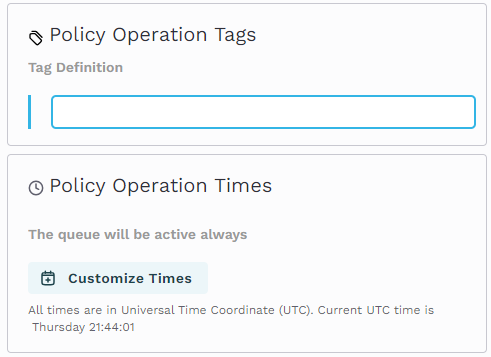
The tag field in routing policies directs items to specific queues, such as those based on lead geographical region, or industry. Using tag operators, you can create formula-based routing that efficiently matches as many records as possible for better management.
Policy Operations Times allows you to define times when the queue will be open or closed. By default, the queue is available at all times.